I found an example of image classification using transfer learning, and I plan to follow the code to study it. The reference book is mentioned at the end of this post. The explanations are detailed, making it a good resource for studying. First, the required libraries are as follows.
import torch, torchvision

from pathlib import Path
import numpy as np
import cv2
import pandas as pd
from tqdm import tqdm
import PIL.Image as Image
import seaborn as sns
from pylab import rcParams
import matplotlib.pyplot as plt
from matplotlib import rc
from matplotlib.ticker import MaxNLocator
from torch.optim import lr_scheduler
from sklearn.model_selection import train_test_split
from sklearn.metrics import confusion_matrix, classification_report
from glob import glob
import shutil
from collections import defaultdict

from torch import nn, optim

import torch.nn.functional as F
import torchvision.transforms as T
from torchvision.datasets import ImageFolder
from torch.utils.data import DataLoader
from torchvision import models
pathlib.Path for easy file path and file system operations, cv2 for image and video processing, Image module of Python Imaging Library (PIL) to open, convert, and save images, seaborn for data visualization and graph generation, pylab.rcParams to adjust basic settings and styles of graphs, MaxNLocator from Matplotlib to automatically adjust tick positions for better readability, lr_scheduler in PyTorch to dynamically adjust the learning rate, glob to find file paths matching specific patterns, shutil for file and directory operations, collections.defaultdict to create dictionaries with default values if the key is missing, torchvision.datasets.ImageFolder to easily load image datasets organized in a directory structure, and torchvision.models which includes various deep learning model architectures, including pre-trained models.
The dataset consists of over 50000 annotated images of more than 40 traffic signs, which can be downloaded from here(https://benchmark.ini.rub.de/?section=gtsrb&subsection=dataset).
train_folders = sorted(glob('GTSRB/Final_Training/Images/*'))
Use sorted and glob to store the file paths of the downloaded images.
def load_image(img_path, resize=True):
  img = cv2.cvtColor(cv2.imread(img_path), cv2.COLOR_BGR2RGB)

  if resize:
    img = cv2.resize(img, (64, 64), interpolation = cv2.INTER_AREA)

  return img

def show_image(img_path):
  img = load_image(img_path)
  plt.imshow(img)
  plt.axis('off')

def show_sign_grid(image_paths):
  images = [load_image(img) for img in image_paths]
  images = torch.as_tensor(images)
  images = images.permute(0, 3, 1, 2)
  grid_img = torchvision.utils.make_grid(images, nrow=11)
  plt.figure(figsize=(24, 12))
  plt.imshow(grid_img.permute(1, 2, 0))
  plt.axis('off');
The load_image function takes the path of an image as input and returns the output. The resize parameter determines whether to resize the image after loading it. cv2.imread reads the image from the specified path, and cv2.cvtColor converts the image from BGR format to RGB format. If resize is True, the image is resized to 64x64.
The show_image function simply loads and displays an image.
The show_sign_grid function uses a for loop to load each image file from the image paths into a list, converts this list to a tensor, and changes its dimensions using permute (batch size, channel, height, width). Then, it arranges the images into a grid with 11 images per row using make_grid and displays the images.
The images can be visualized as follows.
sample_images = [np.random.choice(glob(f'{tf}/*ppm')) for tf in train_folders]
show_sign_grid(sample_images)

class_names = ['priority_road', 'give_way', 'stop', 'no_entry']
class_indices = [12, 13, 14, 17]

!rm -rf data

DATA_DIR = Path('data')

DATASETS = ['train', 'val', 'test']

for ds in DATASETS:
  for cls in class_names:
    (DATA_DIR / ds / cls).mkdir(parents=True, exist_ok=True)

for i, cls_index in enumerate(class_indices):
  image_paths = np.array(glob(f'{train_folders[cls_index]}/*.ppm'))
  class_name = class_names[i]
  print(f'{class_name}: {len(image_paths)}')
  np.random.shuffle(image_paths)

  ds_split = np.split(
    image_paths,
    indices_or_sections=[int(.8*len(image_paths)), int(.9*len(image_paths))]
  )

  dataset_data = zip(DATASETS, ds_split)

  for ds, images in dataset_data:
    for img_path in images:
      shutil.copy(img_path, f'{DATA_DIR}/{ds}/{class_name}/')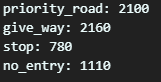
Generate lists of class names and indices using class_names and class_indices. Set the base directory for saving the data, and divide the dataset into training, validation, and test sets. Then, create directories for each dataset type and each class using a for loop. After the loop, each dataset type will have a folder for each class.
In the final for loop, iterate over each class index to get the paths of .ppm image files in the specified directory, and retrieve the current class name from class_names. Split the image file paths into 80% for training, 10% for validation, and 10% for testing. Use zip to match dataset types with the split image file paths, and iterate through each dataset type and corresponding image file paths, copying them to the appropriate dataset directory. This code prepares the dataset for model training and evaluation.
mean_nums = [0.485, 0.456, 0.406]
std_nums = [0.229, 0.224, 0.225]

transforms = {'train': T.Compose([
  T.RandomResizedCrop(size=256),
  T.RandomRotation(degrees=15),
  T.RandomHorizontalFlip(),
  T.ToTensor(),
  T.Normalize(mean_nums, std_nums)
]), 'val': T.Compose([
  T.Resize(size=256),
  T.CenterCrop(size=224),
  T.ToTensor(),
  T.Normalize(mean_nums, std_nums)
]), 'test': T.Compose([
  T.Resize(size=256),
  T.CenterCrop(size=224),
  T.ToTensor(),
  T.Normalize(mean_nums, std_nums)
]),
}
The code uses torchvision.transforms for image preprocessing and data augmentation. First, mean_nums and std_nums represent the mean and standard deviation values for each image channel to perform normalization. The transforms dictionary defines the transformations to be applied to each dataset. The purpose of Compose is to apply multiple transformations sequentially.
RandomResizedCrop randomly crops the image and resizes it to 265x256, RandomRotation randomly rotates the image between -15 and 15 degrees, and RandomHorizontalFlip randomly flips the image horizontally. After augmentation, the image is converted to a PyTorch tensor and normalized using the given mean and standard deviation for each channel. Continued in the next post..
ref : Venelin Valkov - Get SH_T Done with PyTorch_ Solve Real-world Machine Learning Problems with Deep Neural Networks in Python-Venelin Valkov (2020)
'Deep Learning' 카테고리의 다른 글
| 170_Image Classification using Torchvision(3) (0) | 2024.05.19 |
|---|---|
| 169_Image Classification using Torchvision(2) (0) | 2024.05.18 |
| 167_Simple Regression Model using PyTorch(2) (0) | 2024.05.16 |
| 166_Simple Regression Model using PyTorch (0) | 2024.05.15 |
| 165_Debugging with Learning and Validation Curves (0) | 2024.05.14 |